- Server running on Windows Server 2008 R2
- Install Java for launching SAP installation manager
- Install web server IIS 6
- Prepare SAP Installation Master (serial number 50098620 & 51038620 )
- Download the following files from SAP marketplace (found in software
downloads in the latest Net Weaver Package download.) 50098620_2,
50098620_3 and the relevant installation master e.g. for Windows 2008
server on X64 51038620_12
Install Content Server
1) Using 51038620 select correct folder for hardware in use on the server in this
example we are installing on e.g. IM_WINDOWS_X86_64 
2) In the folder find and launch sapinst.exe

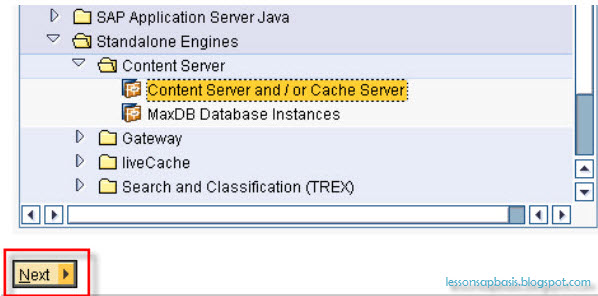
3) Select 'SAP NetWeaver 7.0 including Enhancement Package...', then 'Standalone Engines', then 'Content Server', lastly 'Content Server and / or Cache Server' as shown below.


4) Click on the highlighted ‘Next’ button as shown below
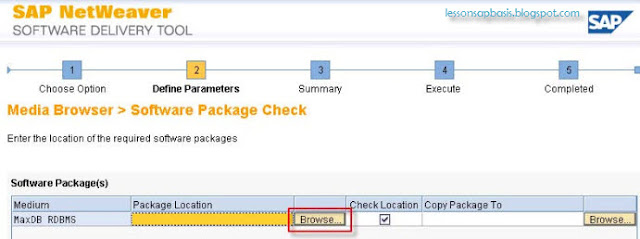
5) Click on the highlighted 'Browse' button

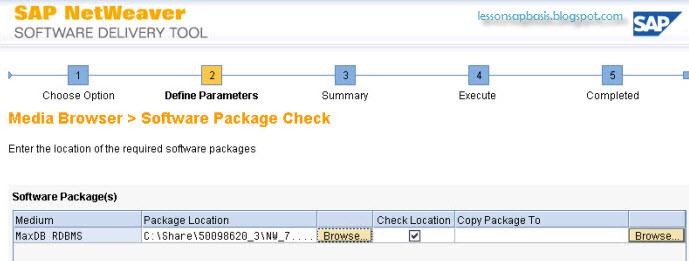
6) Locate the file LABEL.ASC on the 50098620_2 download or DVD and click OK


7) Click on the 'Next' button to continue


8) De‐select Cache Server and select Database Instance and select ‘Next’


9) Review and modify, if required, the installation settings and select ‘Next'


10) Click on browse button

11) Locate the file SDBINST.EXE on the 50098620_3 download or DVD in the corresponding directory for the operating system and type and click 'OK'

12) Once selected click 'Next'

13) You will be prompted to enter the passwords for the user accounts 'superdba' and 'control'. Please make a note of what these passwords are as you will need them later.


12) Once selected click 'Next'
13) You will be prompted to enter the passwords for the user accounts 'superdba' and 'control'. Please make a note of what these passwords are as you will need them later.
14) Review database installation parameters and click 'Next'

15) Review database log volumes, this is where the log files will be stored, and click on 'Next'

16) Review storage parameters for the database, amending the storage location if required, click 'Next'

15) Review database log volumes, this is where the log files will be stored, and click on 'Next'

16) Review storage parameters for the database, amending the storage location if required, click 'Next'

17) Review and amend previous entries before starting the installation. Click 'Next' to start the install

18) The Installation process will start with the progress shown on the screen

19) When complete a message will appear telling you it was successful. Select 'OK' to finish


18) The Installation process will start with the progress shown on the screen

19) When complete a message will appear telling you it was successful. Select 'OK' to finish
